How to Fix Recording Stopped Error in Snipping Tool for Windows 11:
If you using computer for various purposes like making Word Document, taking screenshots etc. Snipping Toll is one of the best application present in Windows. It is pre-installed application of Microsoft Windows. It is very useful for taking screenshots and recording screen.
Sometimes due to some technical error like corrupted files, outdated application can cause the failure of Snipping Tool and shows you the error Recording Stopped in Snipping Tool. So, for you we have come up with the article “How to Fix Recording Stopped Error in Snipping Tool for Windows 11” which dedicatedly solves your problem.
Without further ado. Let’s get started.

Fix 1: Restart the Computer
First things comes first. The basic troubleshooting step is most important. Sometimes due to some technical issue some applications or even whole computer system do not work correctly. So, if your you are facing issue in the snipping tool then restart your computer and check whether Recording Stopped Error in Snipping Tool resolved or not.
Fix 2: Repair the Snipping Tool App
Repairing the application is one the best method for any app to function properly. Follow the below steps to repair the Snipping tool:
Step 1: Press the Windows + I.
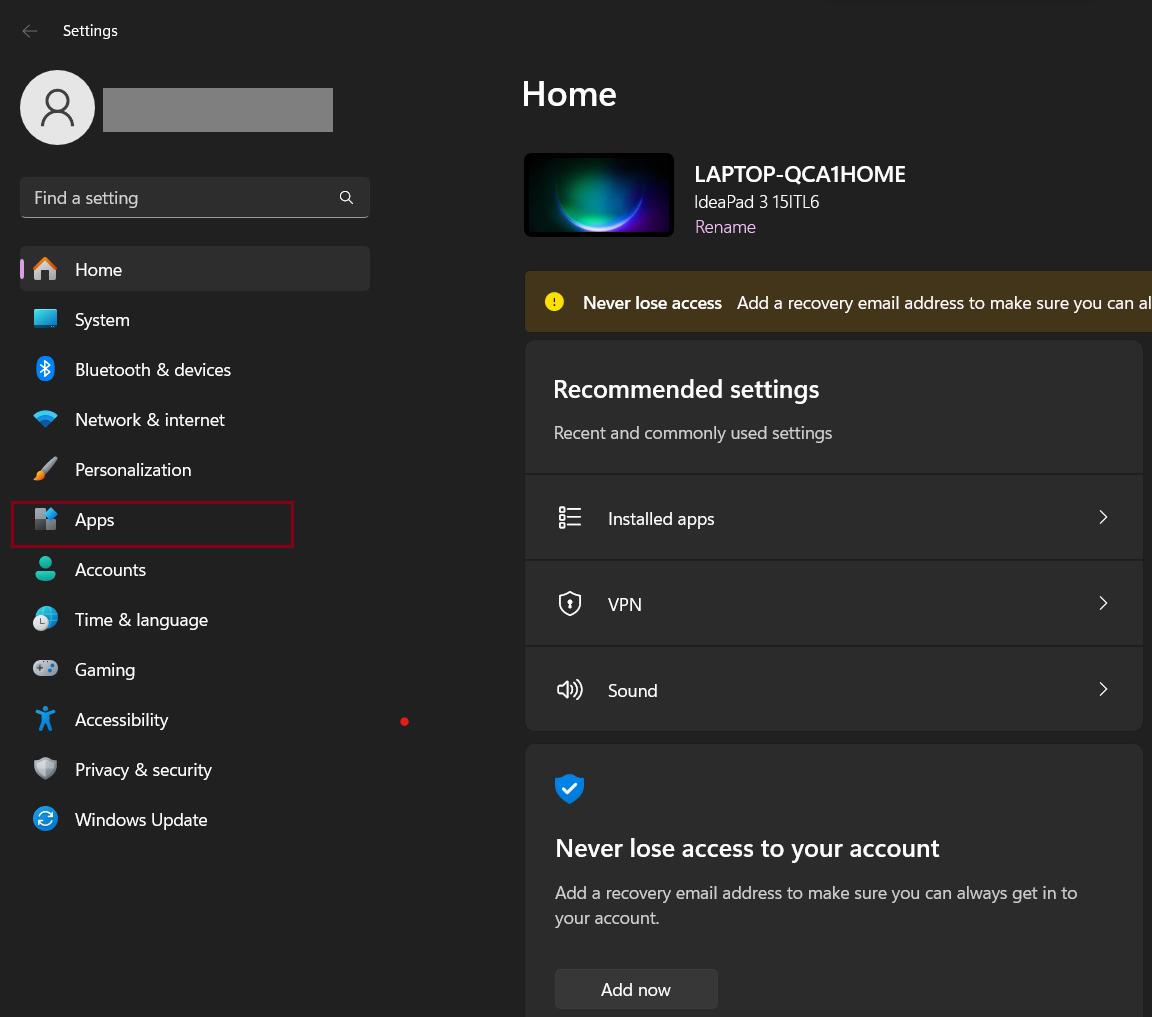
Step 2: Select the App from the left-side bar.
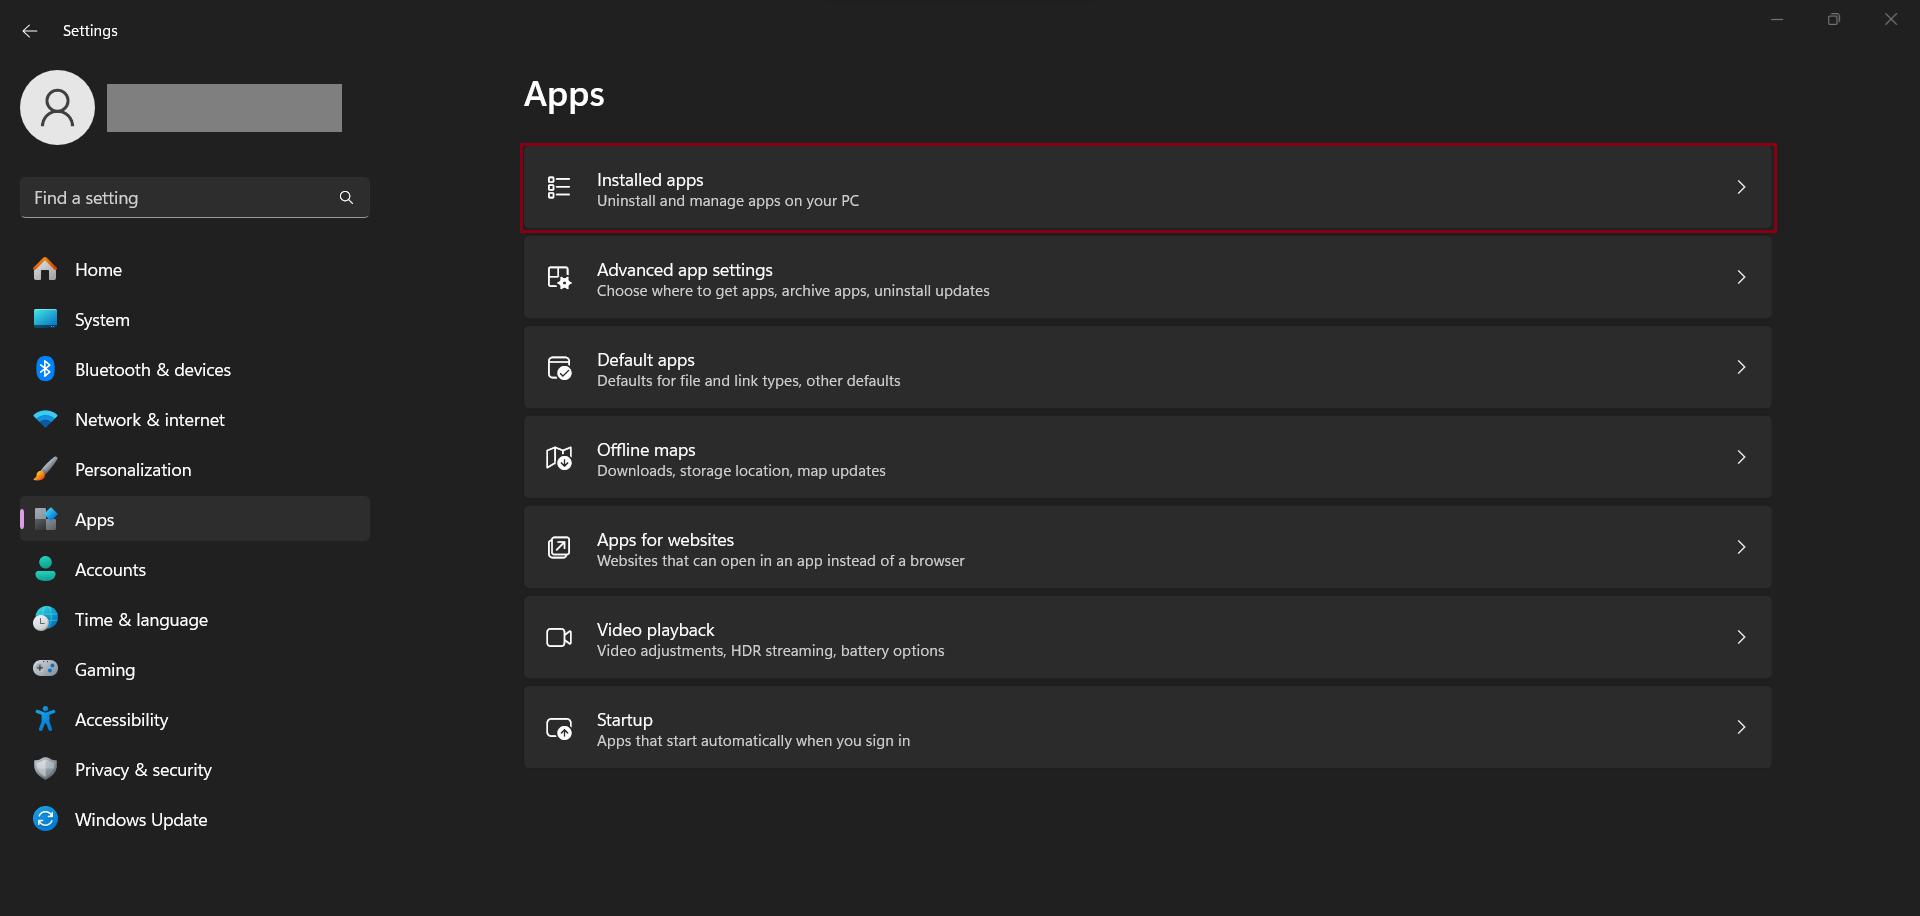
Step 3: Now click on the Installed Apps from the Right hand side bar.
Step 4: In the Search bar search for the Snipping Tool.
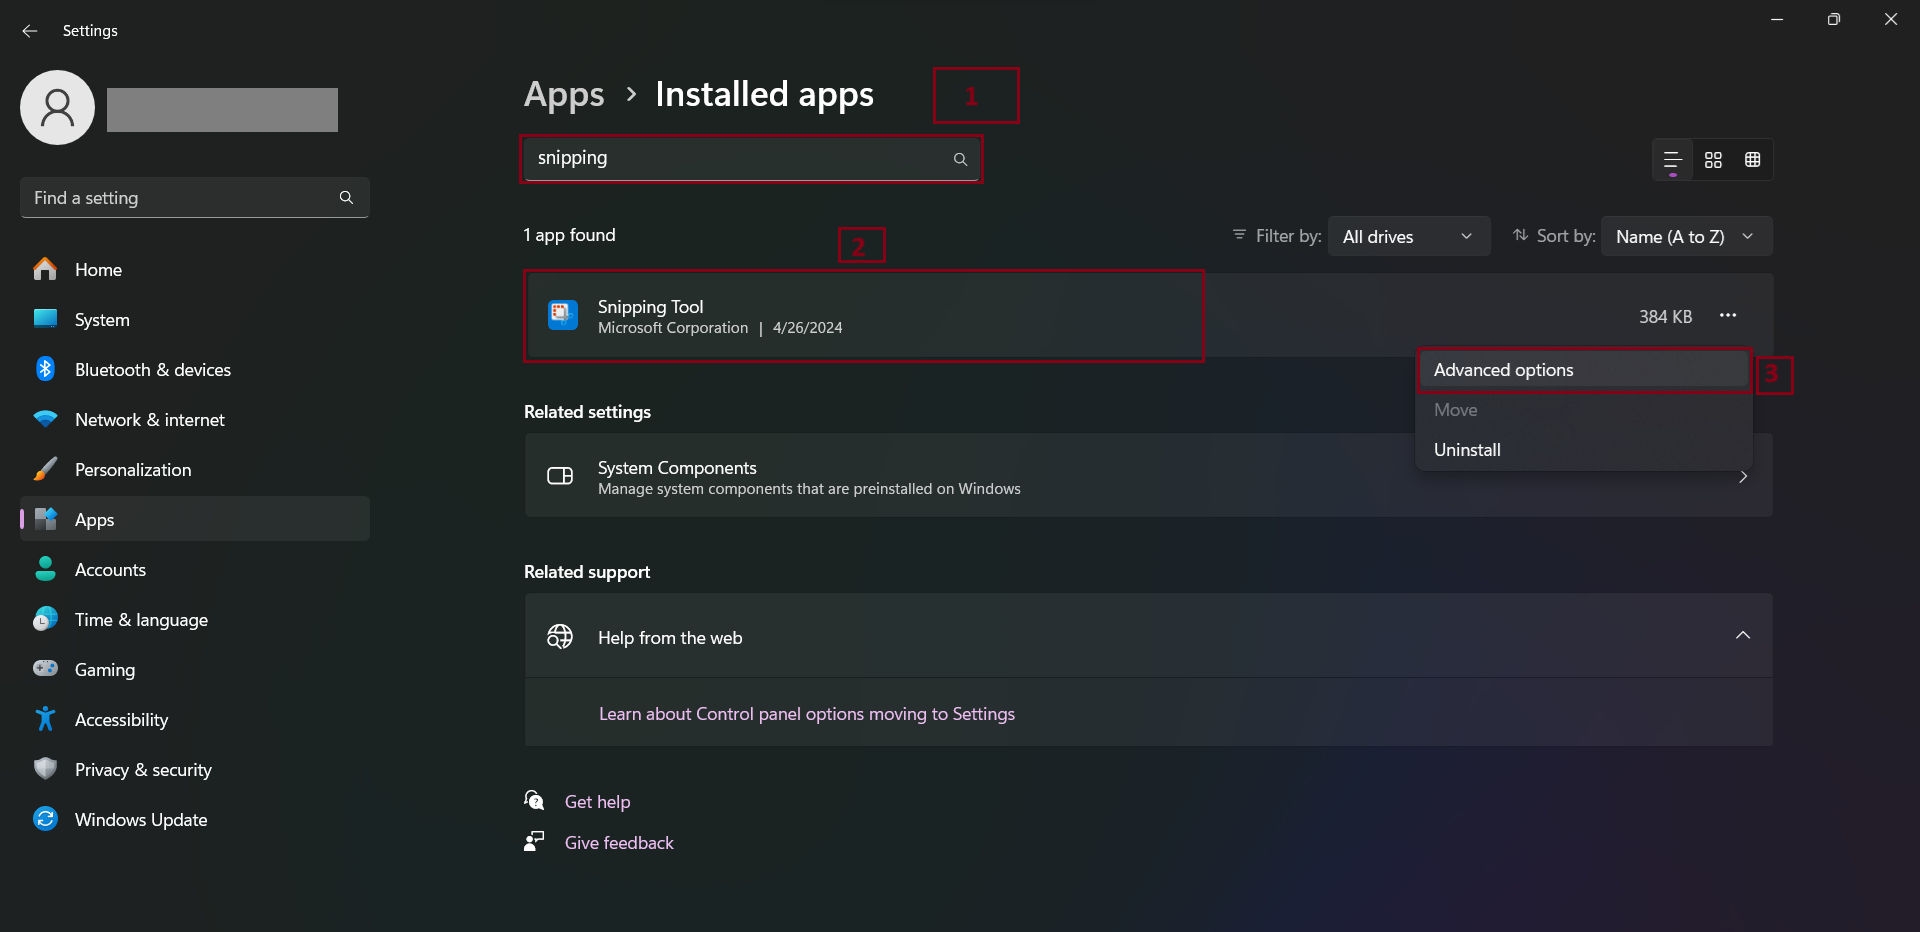
Step 5 : In the Snipping Tool click on the Three Dots present at the extreme right side and click on the Advanced Setting.
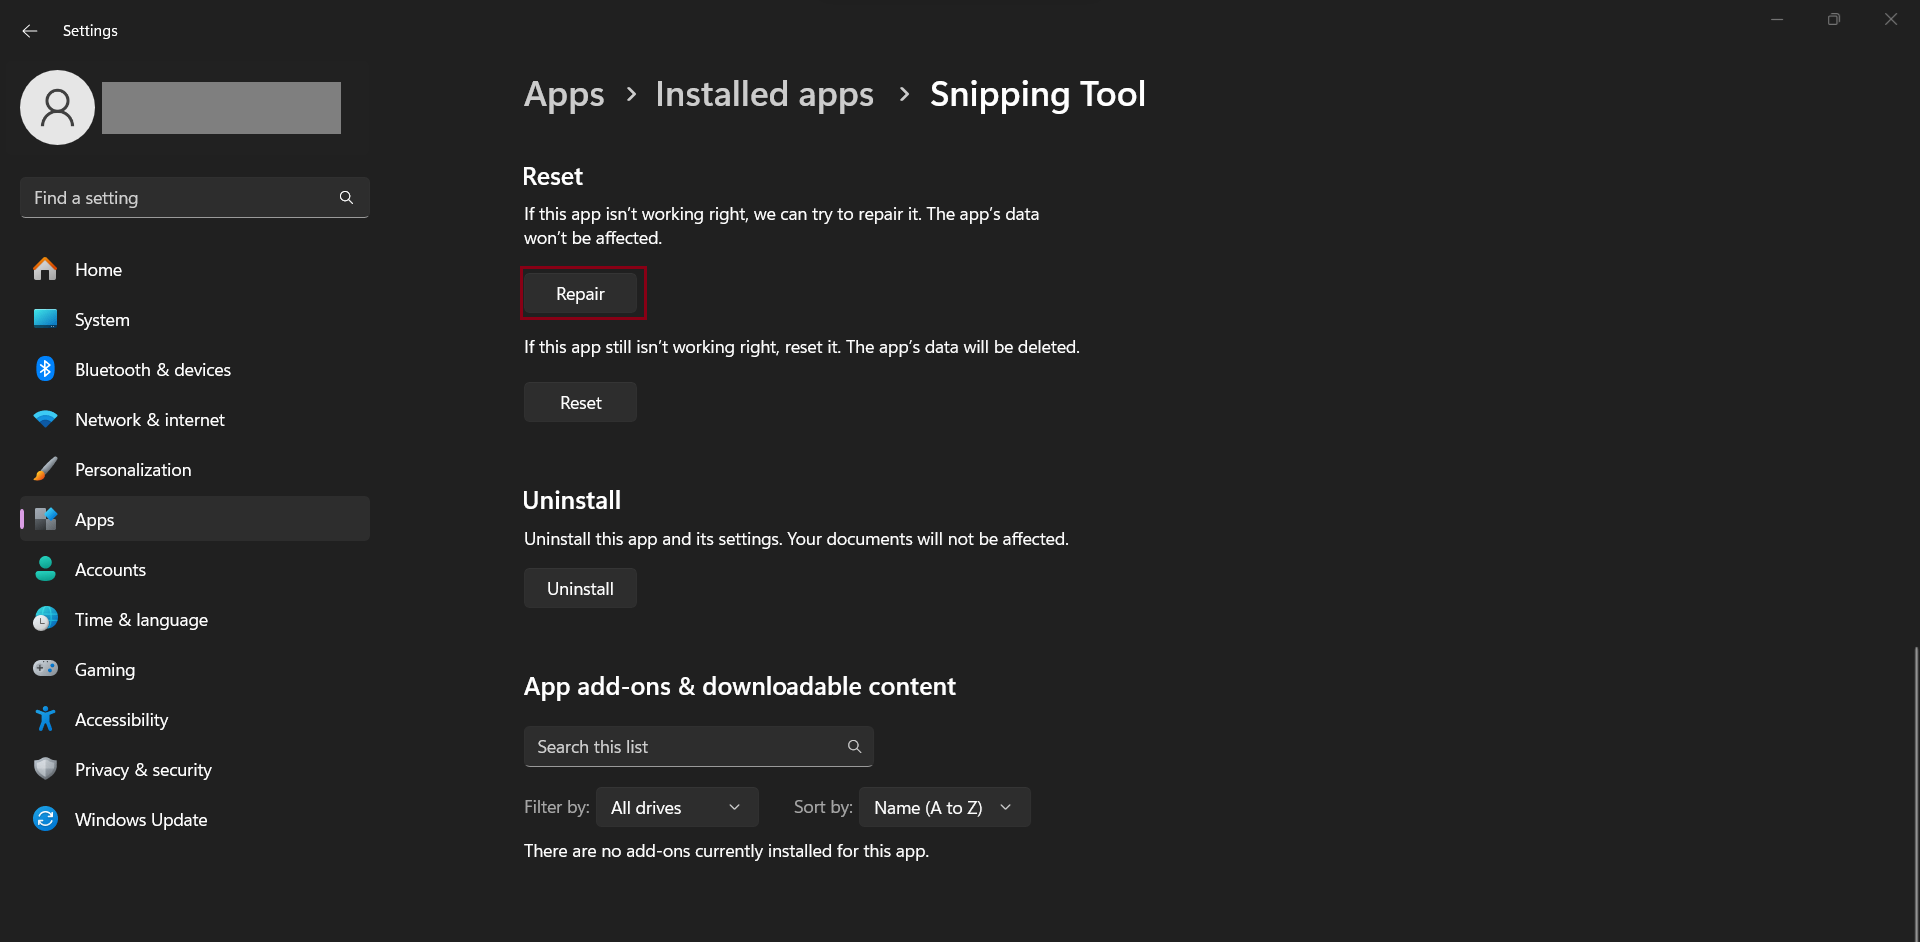
Step 6: After a window will pop-up there click on the Repair option.
Fix 3: Change the default save Location for the Screen Recording
Recording Stopped Error in Snipping Tool for Windows 11 comes when the location not accessible for saving the screen recording. So, changing the default location of Snipping Tool can solve your problem.
Step 1: Press the Windows + E keyboard shortcut to open the File Explorer
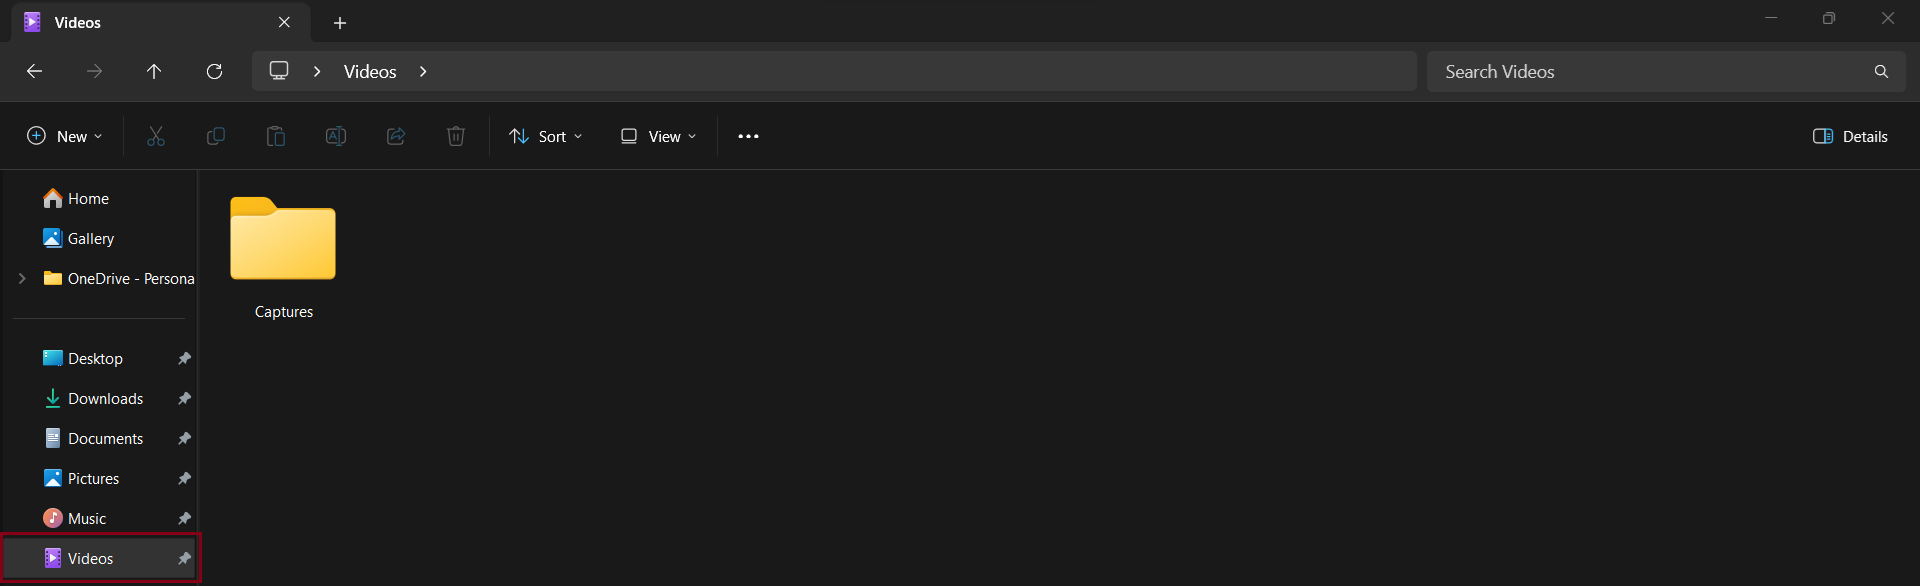
Step 2: Select Videos from the left pane.
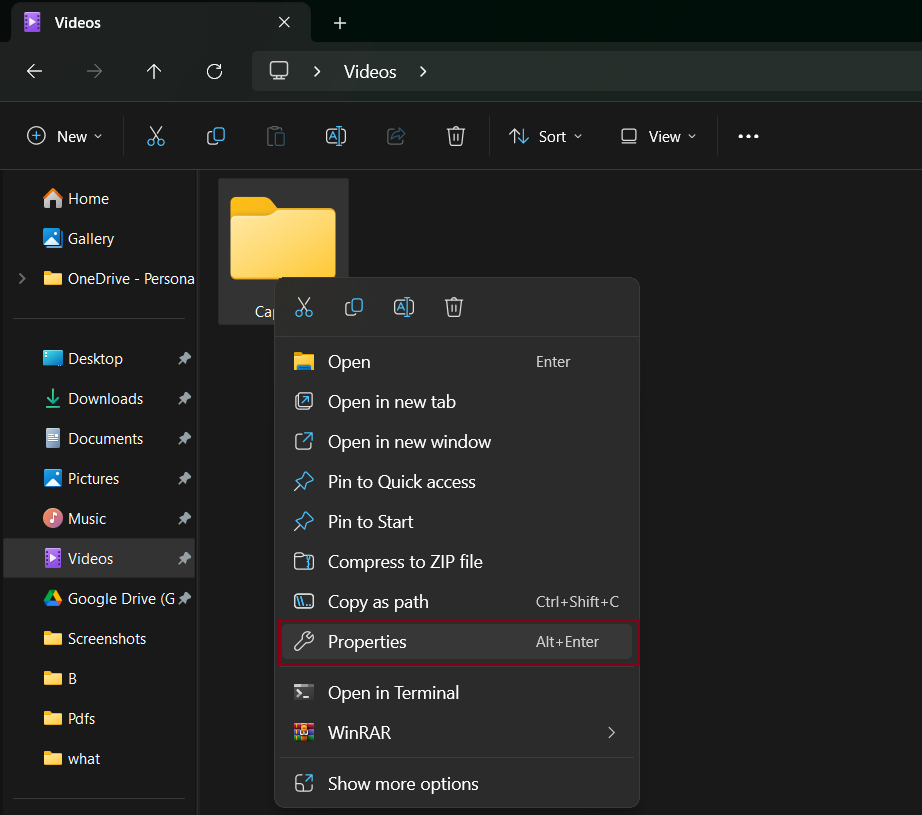
Step 3: Then Right-click on the Captures folder and select Properties
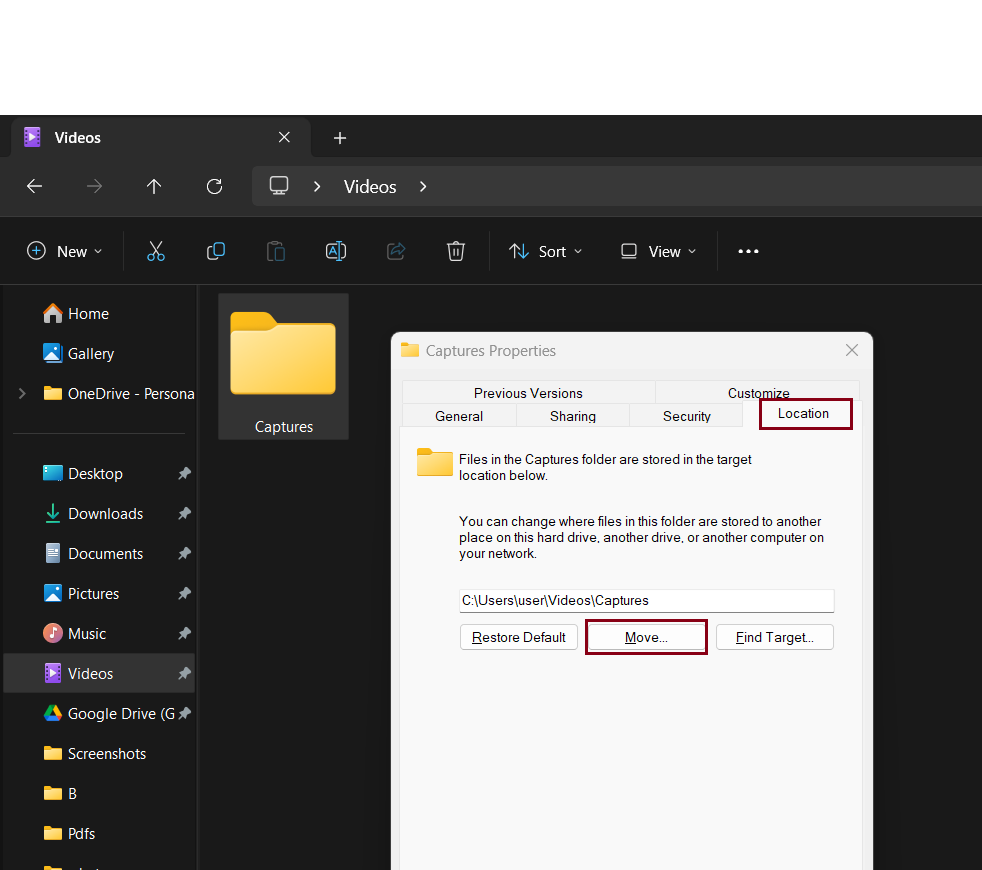
Step 4: In the Location tab, Click on the Move button.
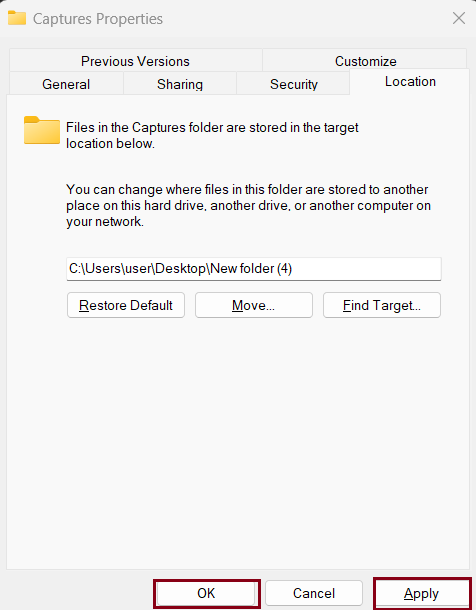
Step 5: Provide the new location and click on Select Folder.

Step 6: Click Apply followed by OK.
Fix 4: Reset the App
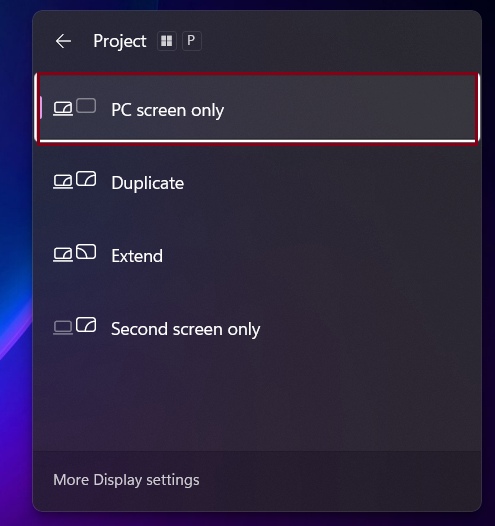
Fix 5: Disable the Screen Projection
Sometimes using multiple screens can create problem in recording through snipping tool.
You can disable the Screen Projection by using the Windows + P shortcut. Keep the PC Screen Only. and check whether screen recording is going on.
Fix 6: Scan the File System
Corruption files are common in the computer. These corrupted file system can create lots of problems in the proper functioning of the applications. Windows has come up with feature by using which we can scan the various corrupted files present in the computer which are causing the issue.
Step 1: Right Click on the Windows button.
Step 2: Select the Terminal(Admin).

Step 3: After clicking on the Terminal, a User Acceptance Control will come. Select Yes in the UAC.
Step 4: A console will open, type the mentioned command in the console: SFC /scannow
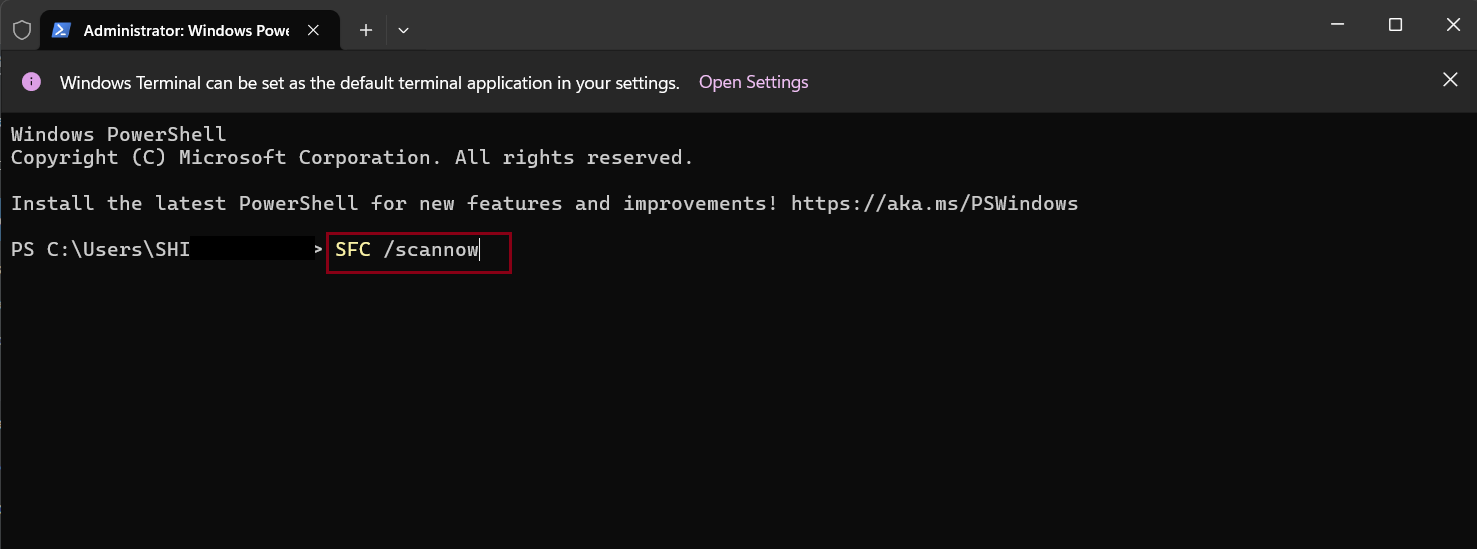
Step 5: After that enter the command one by one :
DISM /Online /Cleanup-Image /CheckHealth DISM /Online /Cleanup-Image /ScanHealth DISM /Online /Cleanup-Image /RestoreHealthWait for the scan to complete and restart the computer and check that the issue is resolved and you are able to the save the recording.
Fix 7: Run the Windows Apps Troubleshooter
Running the Windows App Troubleshooter can solve most of the issues. Anything which is causing the issue then this method can solve the Recording Stopped Error in Snipping Tool for Windows 11. So, run the troubleshooter and resolve the hidden problems and start saving the recording.
Step 1: Press the Windows + I.
Step 2: In the search bar search for the troubleshooting settings.

Step 3: Select the other troubleshooters.
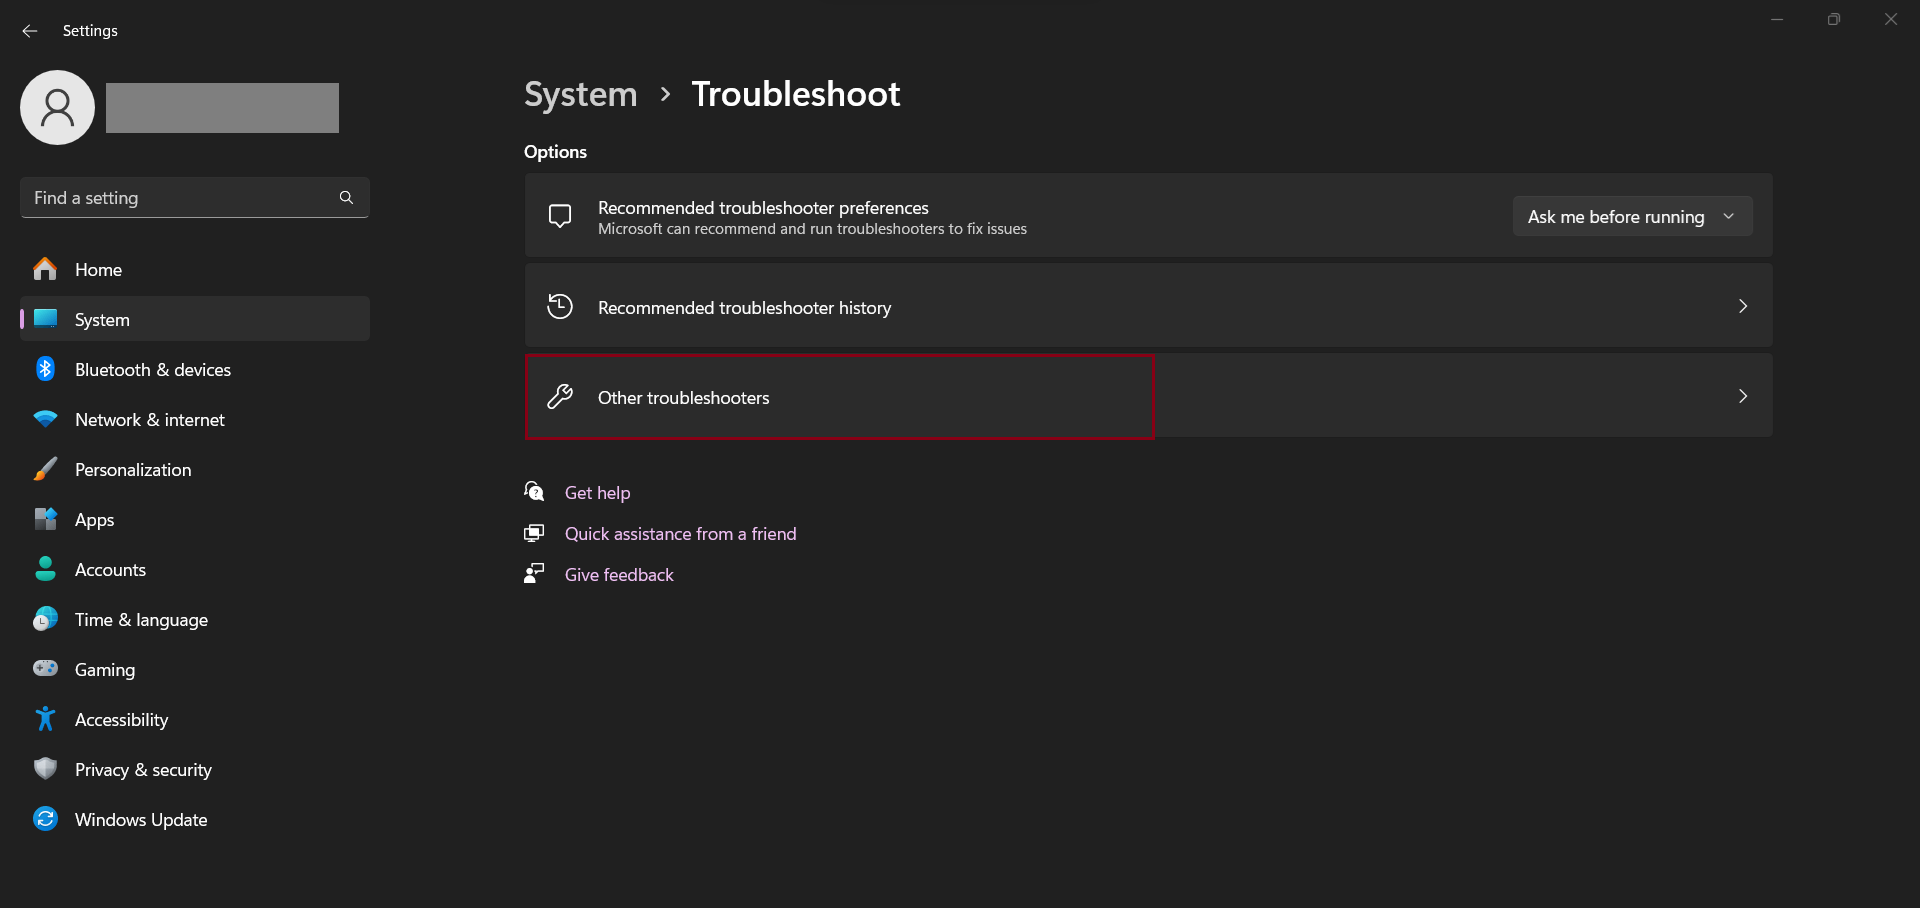
Step 4: Click the Run button next to Windows Store Apps.
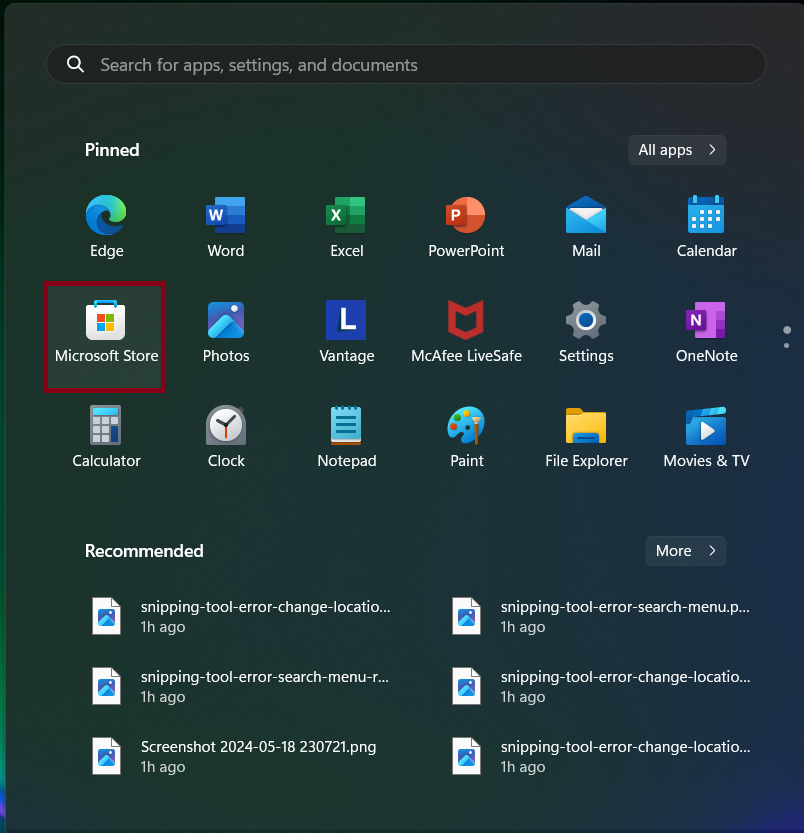
Fix 8: Check for the Snipping Tool App Update
If the application you are using may be outdated which show you the error Recording Stopped Error in Snipping Tool. So, check that is there any update available for the Snipping Tool in the Microsoft Store App.
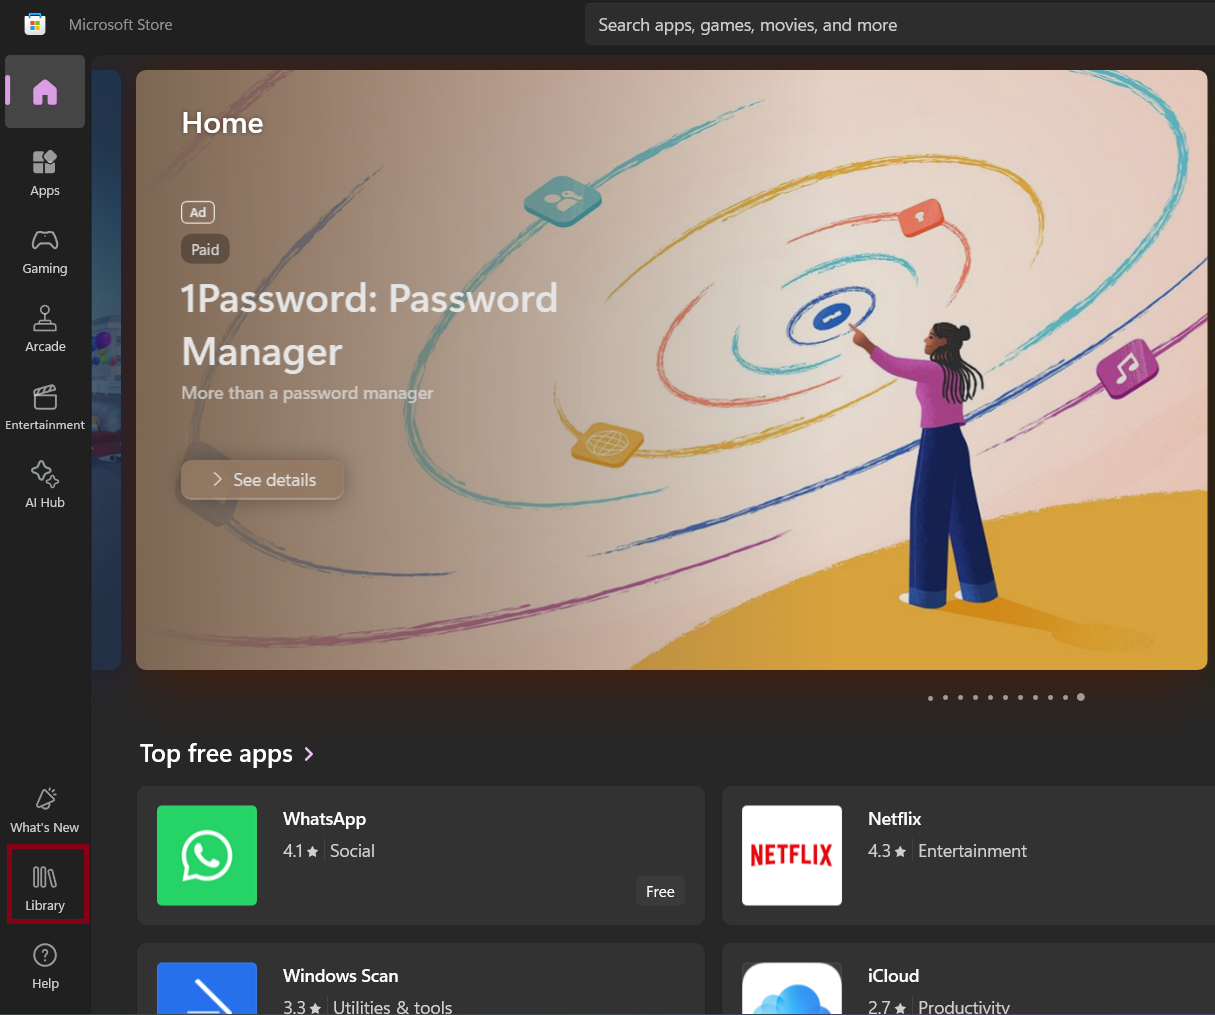
Step 1: Open the Microsoft Store app from the Start Menu.
Step 2: Click on the Library icon in the left sidebar
Step 3: Click on the Get updates option.
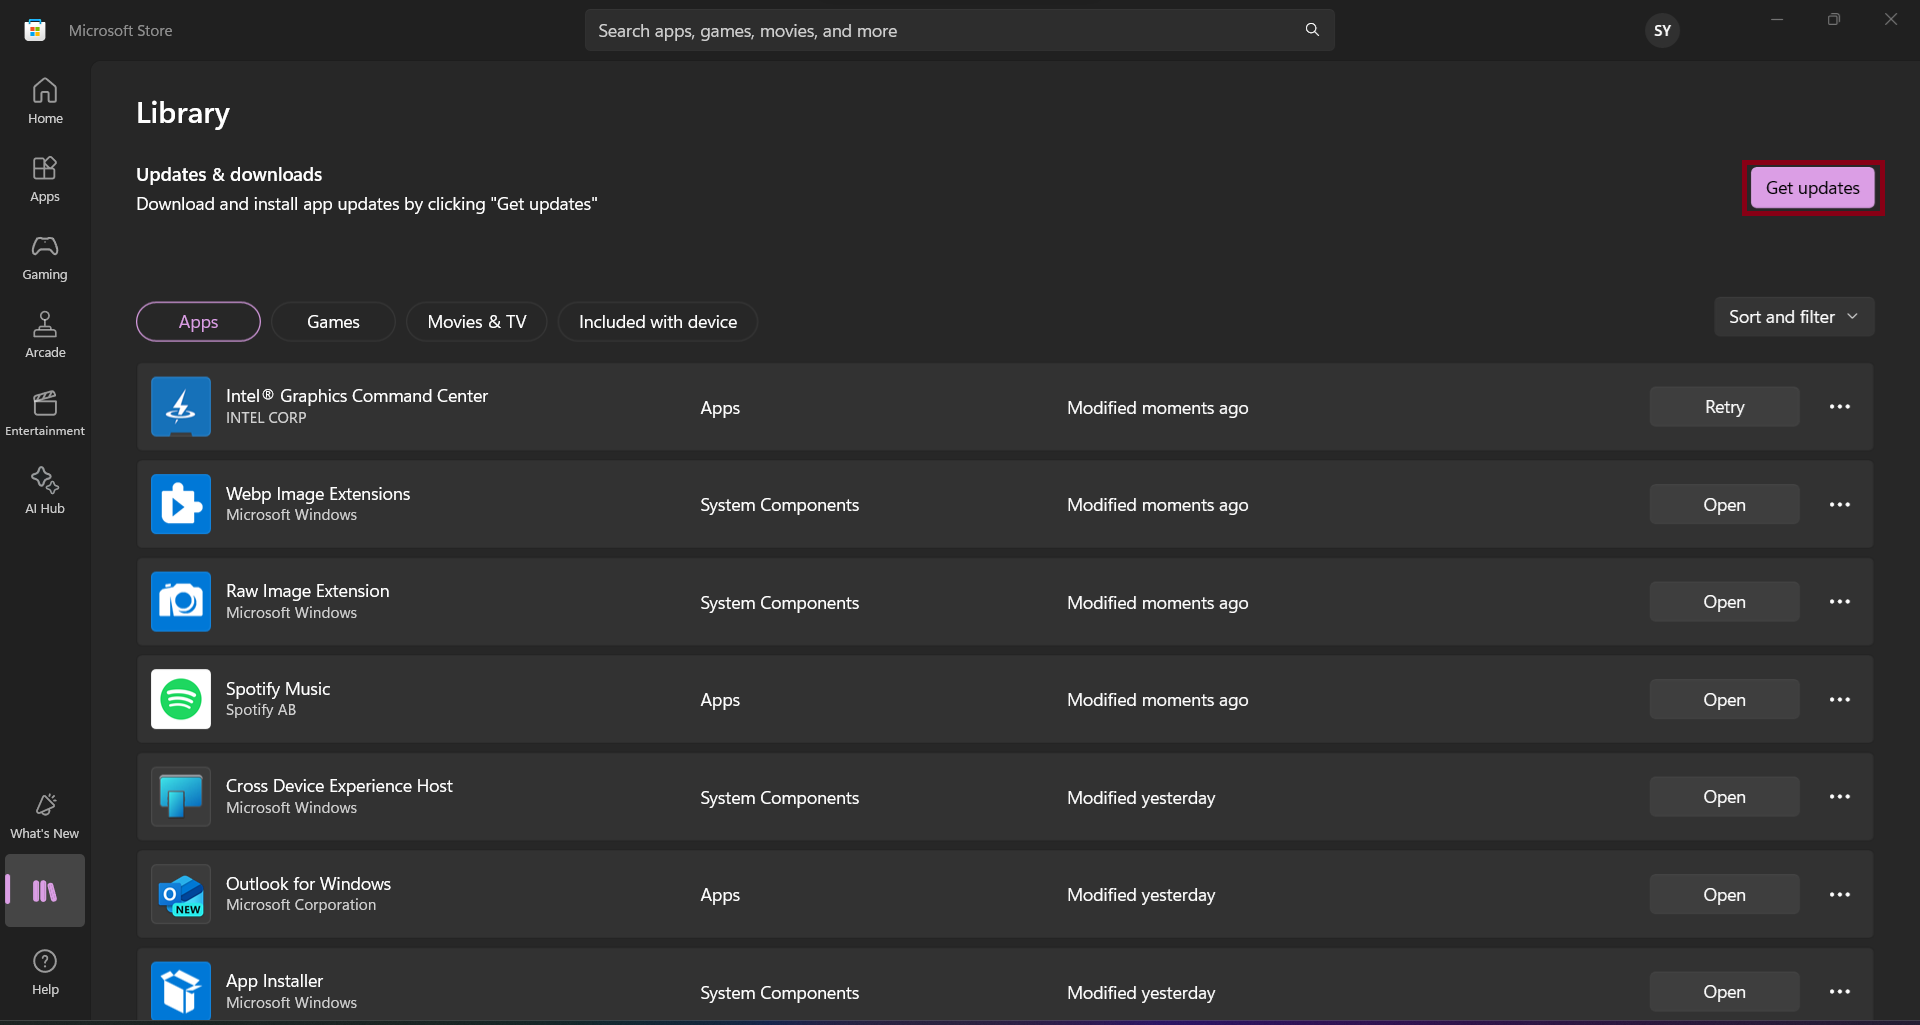
Step 4: Check if there is an update showing for Word app and if yes, download and install it.
Fix 9: Check For Windows Update
After updating the application your problem is not resolved then there is chance that you are using the older version of the Windows. Because every latest version new functionality and previous issues which were product bugs have been fixed. So, check that your Windows is updated or not.
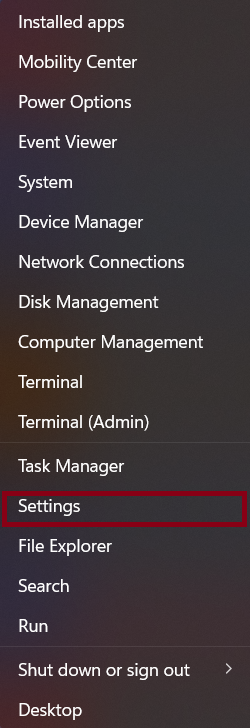
Step 1: Press “Windows key + X“
Step 2: Then go to “Settings” Option.
Step 3: Click on the “Update and Security” Option.
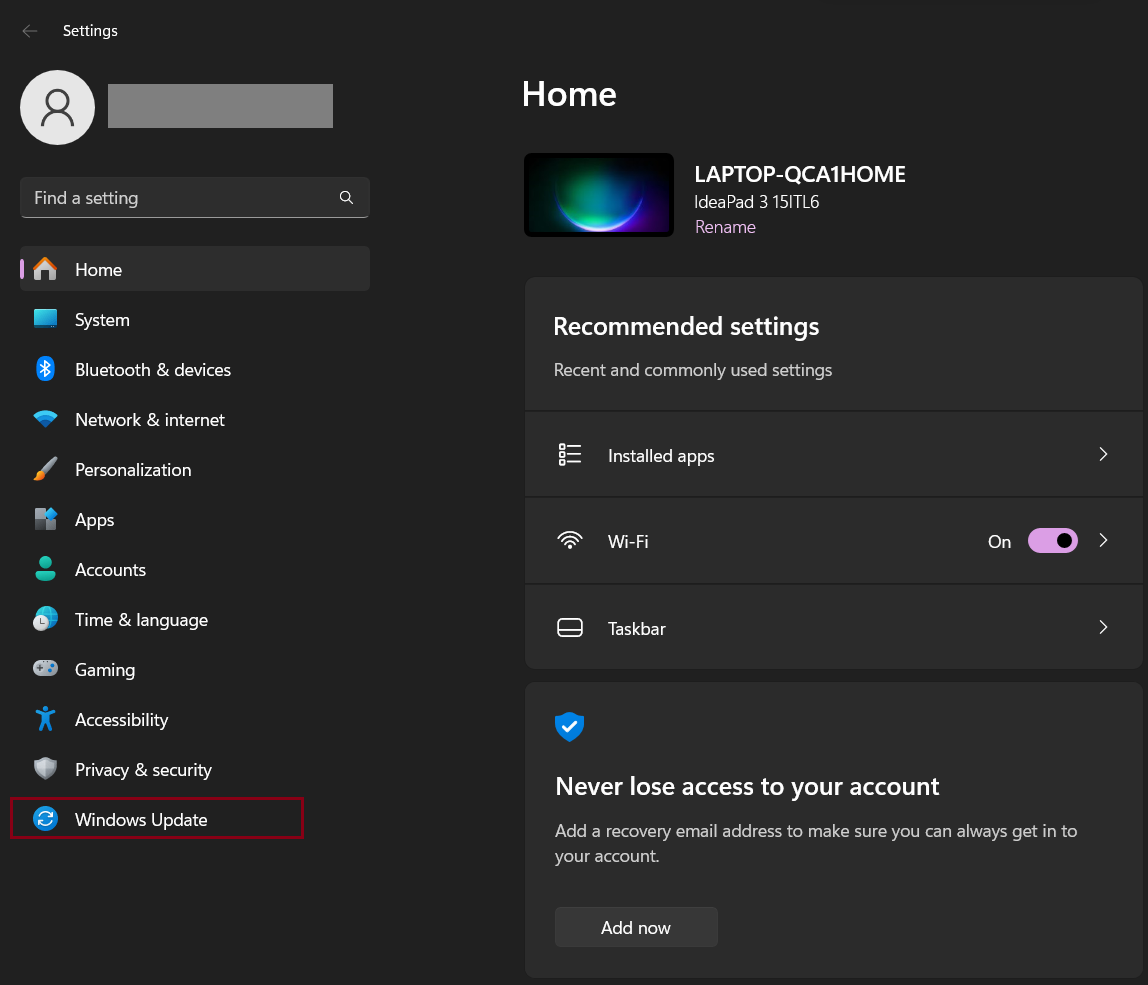
Step 4: Choose “Windows Update” option.
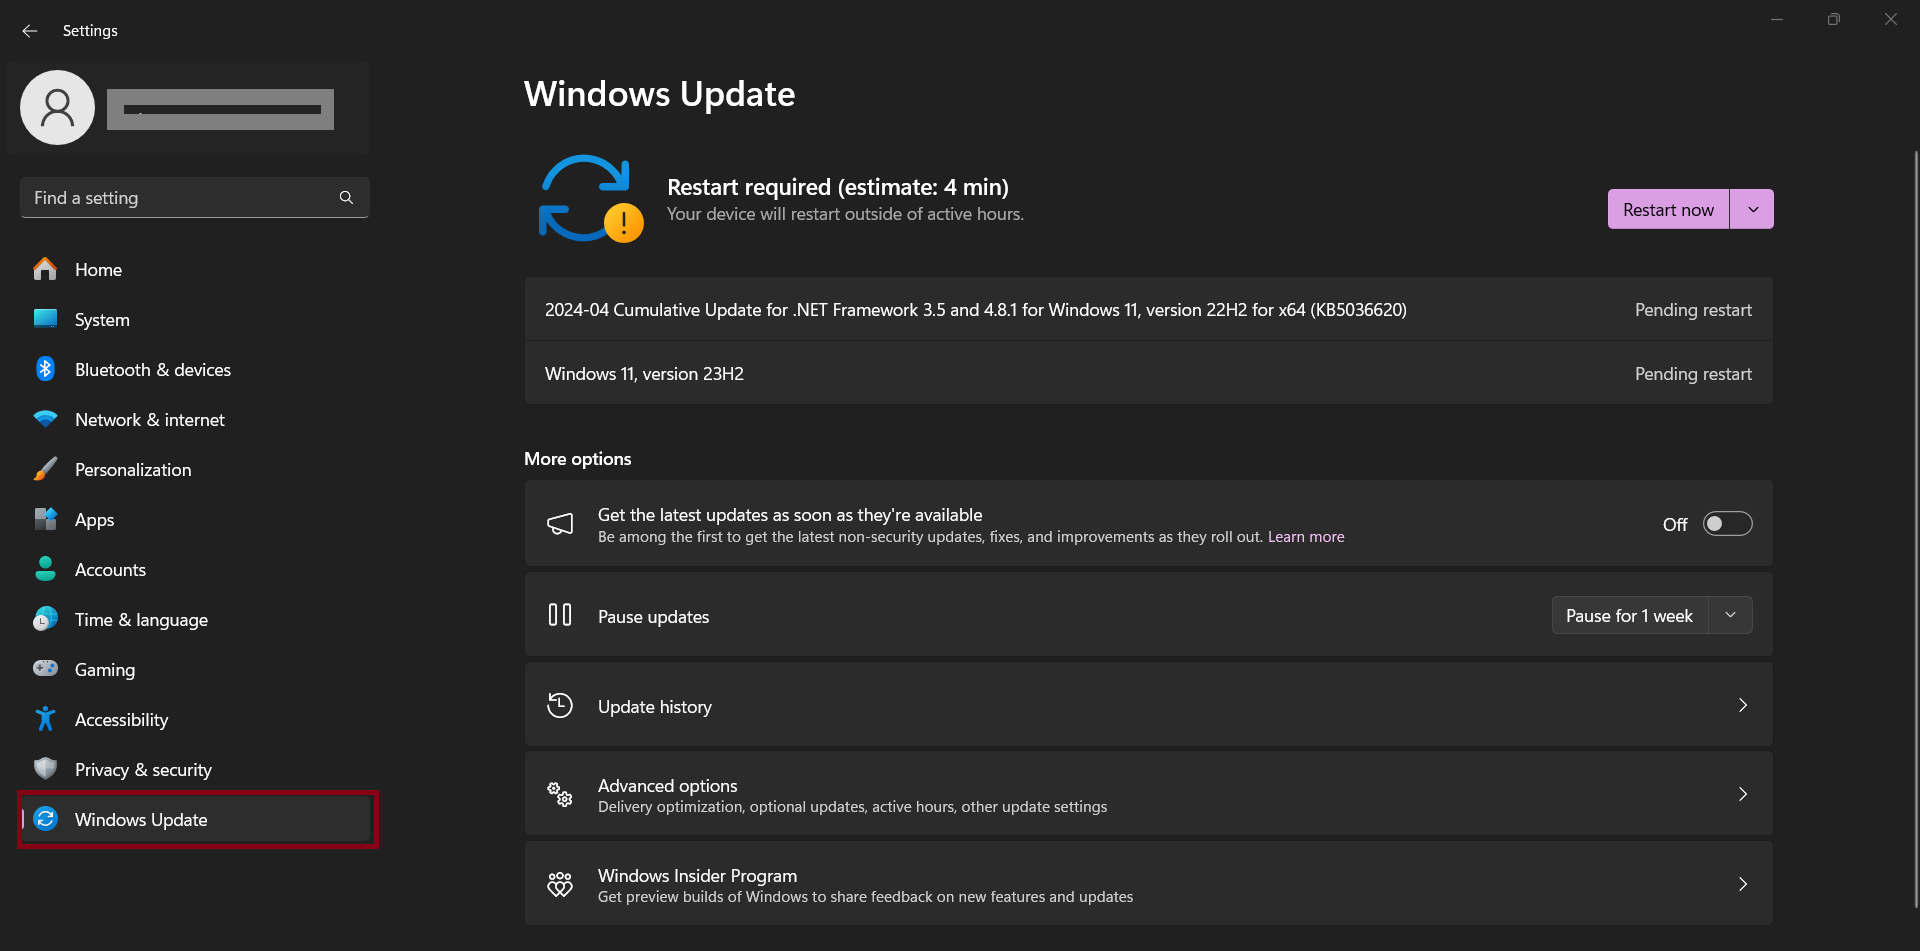
Step 5: Check for Updates if any available and then install all updates available.
After the installation of the “Updates”. Restart the computer and then try to add a printer and check that issue How to Fix Recording Stopped Error in Snipping Tool for Windows 11 is resolved or not.
Also Read:
- Windows 11 Caps Lock Light Is Not Working
- Stop Microsoft Edge from Opening PDFs on Windows 10
- Enable Dark Mode in Notepad on Windows 11
- Fix Bluetooth Missing From Device Manager in Windows 11
- Copy Dropbox Files to Your Android Photos Collection
Final Words:
We hope you like our post on “How to Fix Recording Stopped Error in Snipping Tool for Windows 11” then share this article with your friends and followers. Your each share helps us and motivates us to provide you the better content.
If you have query and suggestions then please fell free to let us know.
Thanks!
